IVAE Cull manual
IVAE Cull culls a whole session in one afternoon: it reads the preview the camera stores inside every RAW, measures focus and exposure, detects faces and closed eyes, groups the bursts and suggests the best shot of every moment. Everything runs on your computer: no photo is uploaded. At the end you export XMP for Lightroom or Capture One, or the developed JPGs.
This manual covers the installed app on Mac and on Windows. The screenshots are the app as it is.
Getting started
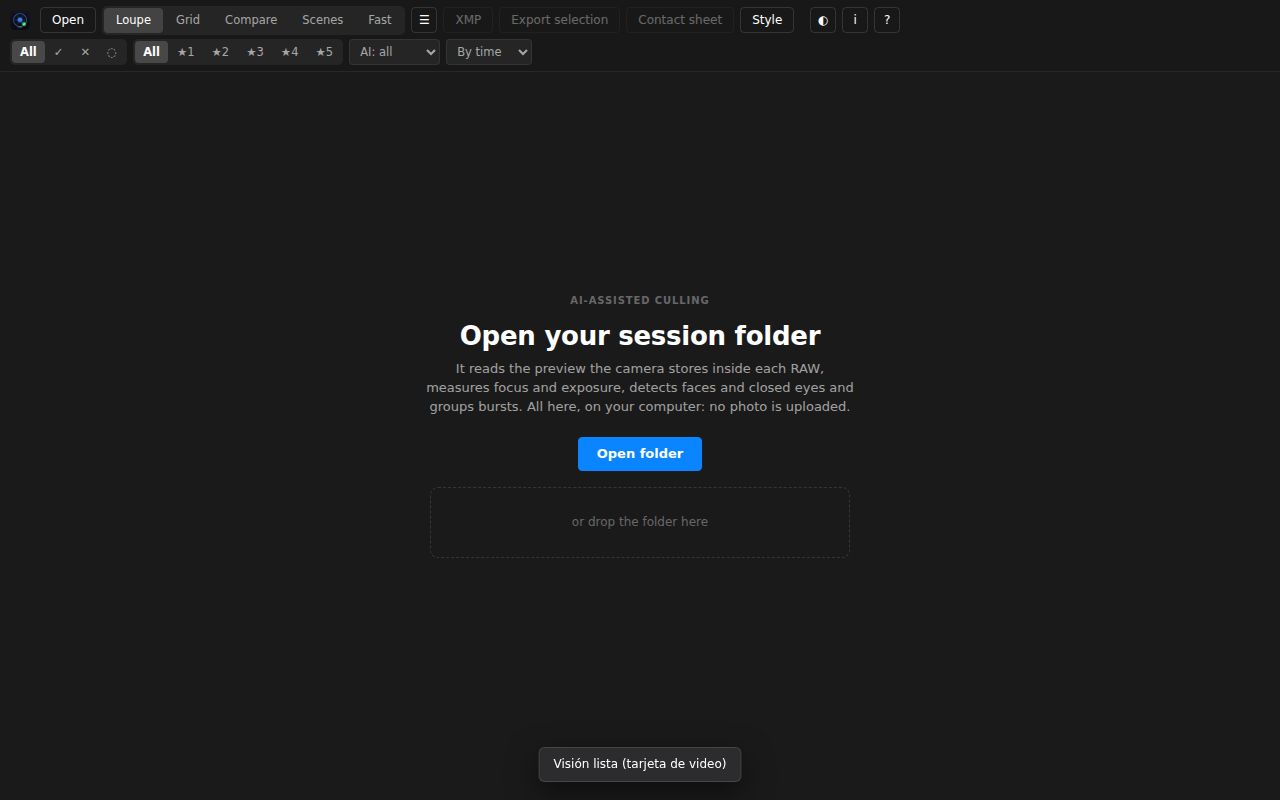
- Install the app (see Installation) and sign in with your IVAE Gallery studio account. Cull is included in every plan.
- Press Open folder (or the O key) and choose the session folder, or drag it onto the window. It reads ARW, CR2, CR3, NEF, DNG, RAF, ORF and RW2, and JPG too.
- The analysis starts on its own. The bar at the bottom says how many are done; you can start looking at the first ones while the rest finish.
- Recent folders stay on the start screen so you can go back with one click.
The loupe
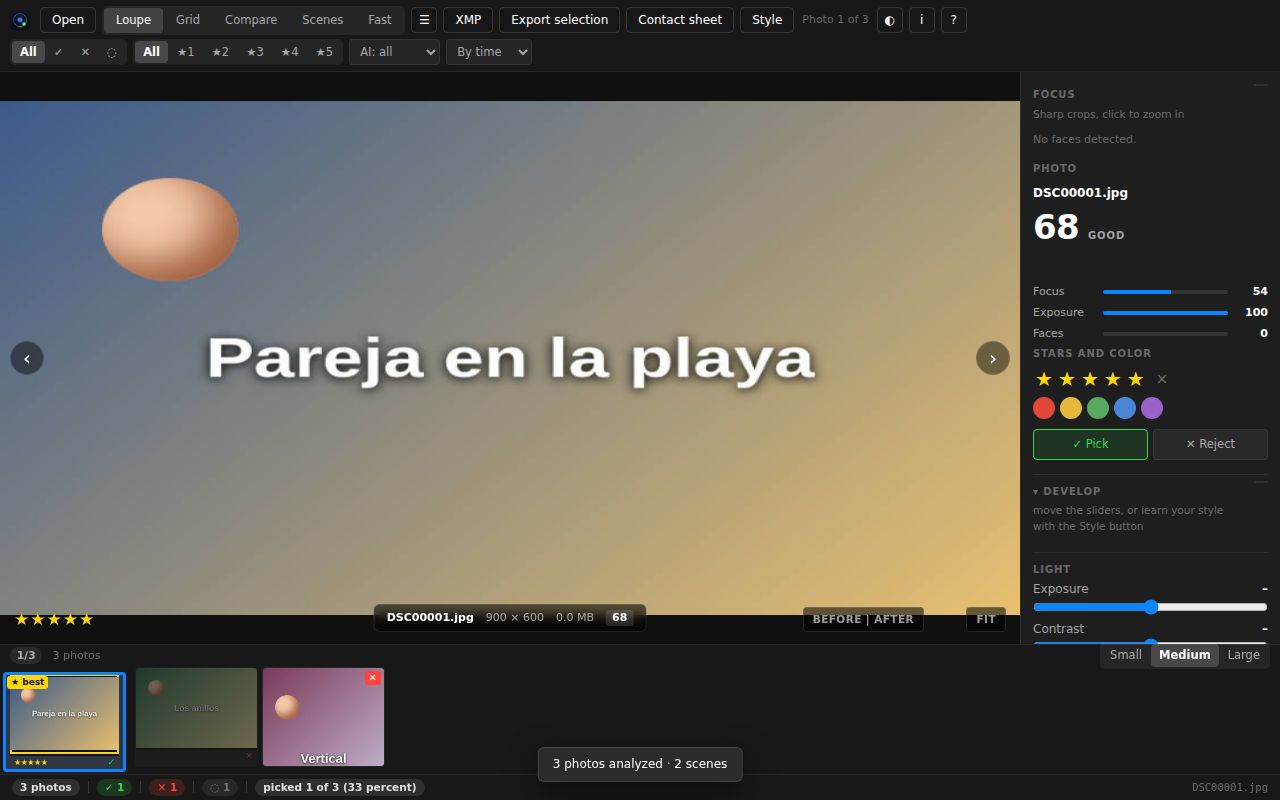
The loupe shows one big photo with the session strip below. On top of the photo are the faces the AI found, each with its verdict (eyes open or closed, focus, smile). On the right, the panel with the AI score, the focus and exposure bars, the camera data and the photo's tags (blurry, closed eyes, tilted, copy of another).
- Stars, colors and flags: keys 1 to 5 for stars, 0 clears them, 6 to 9 set red, yellow, green and blue. P picks, X rejects, U clears the flag (those three keys can be changed in the drawer, under Shortcuts).
- Moving around: ← and → for the previous and next photo; ↑ and ↓ for the row. Enter or Space switch between loupe and grid. Esc closes whatever is open.
- Zoom: Z zooms to 100 percent. Holding A shows the before, without the develop. Y splits the photo into before and after.
- Faces up close: the strip at the top of the loupe shows every face at 100 percent with its verdict. N zooms to the next face, Shift+N to the previous one, clicking a face zooms there too, and V goes back to the whole photo.
- Straighten: if the AI detected a tilted horizon, the photo carries the "tilted" tag with the degrees. H accepts the angle (the loupe paints the photo rotated and cropped; the XMP carries the angle and the crop the way Lightroom reads them). The panel has a slider to correct it by hand; another H removes it.
- Data panel: I opens and closes it.
The grid and the drawer
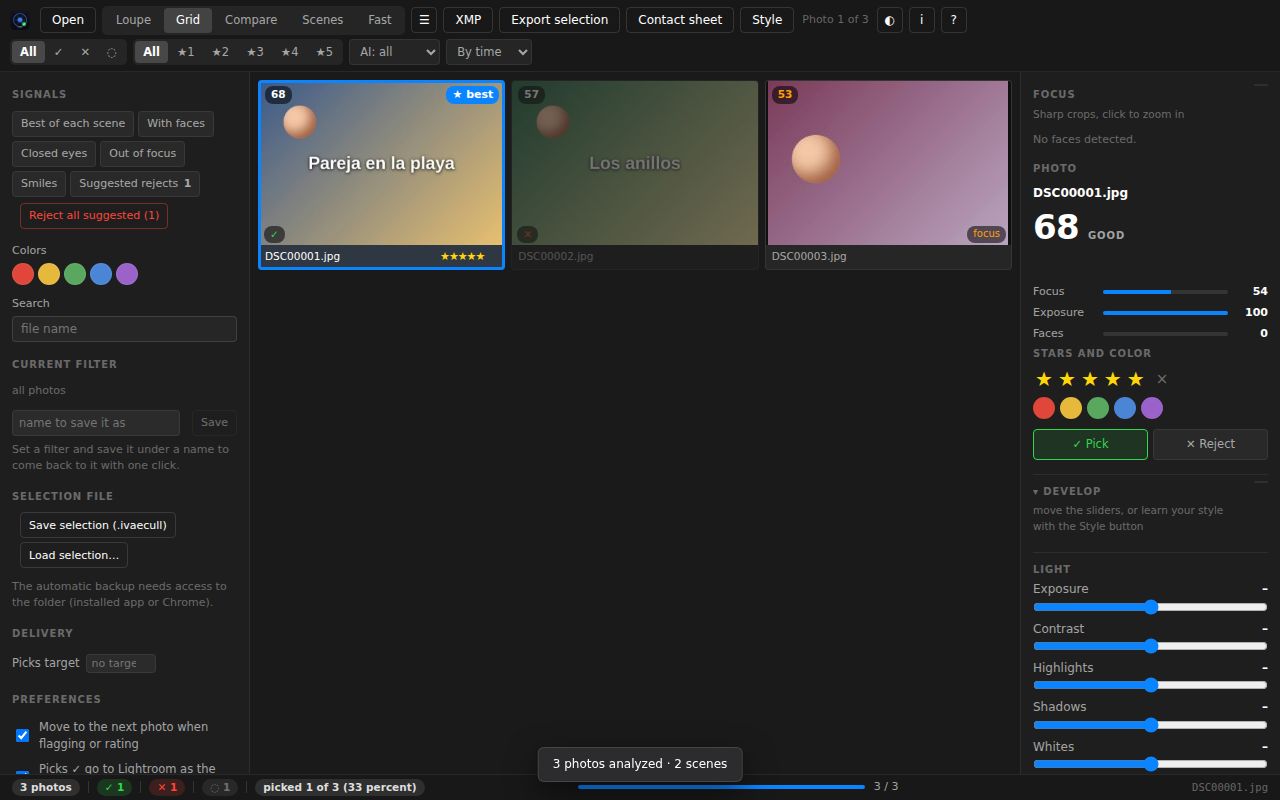
The grid shows the whole session with the score in the corner of every photo and a colored border per scene. Cmd+A selects all visible photos (Ctrl+A on Windows).
The drawer (F, or the ☰ button) holds the filters and everything that acts on the whole session:
- Filters: flags, stars, AI score, colors and text. Each signal (with faces, closed eyes, blurry, smiles, best of each scene) is requested with one click, negated with another ("no closed eyes") and turned off with a third. The current filter can be saved under a name to come back to it with one click.
- Suggested rejects: the chip filters what the AI would reject (blurry, closed eyes, discardable score, repeats worse than the best of their scene), with the reason in the panel. The button flags them all with ✕ at once; Cmd+Z brings them back together.
- Repeats: the chip filters identical copies (the same image under another name). The loupe and the panel say which one it is a copy of.
- Delivery: a target number of picks; the status bar says how many you have and how many are missing or over.
- Selection file: save and load the selection as
.ivaecullto continue on another computer (matched by file name). The automatic backup is written every 2 minutes in the.ivaecullsubfolder of the session, and on reopening you are offered to recover it. - Cameras: with two cameras, an offset per camera (behind or ahead) fixes the time before sorting and grouping scenes.
- Keywords and rights: author, rights and keywords of the session (and of each photo) go to the XMP as
dc:creator,dc:rights,xmpRights:Markedanddc:subject, and survive rewrites. - My selection: the picker learns from your past selections (you point it to delivered sessions) so that "best of each scene" follows your taste, not the factory one.
- Language, shortcuts and appearance: Spanish or English, the pick and reject keys, and the dark, light or system theme.
Scenes, compare and fast mode
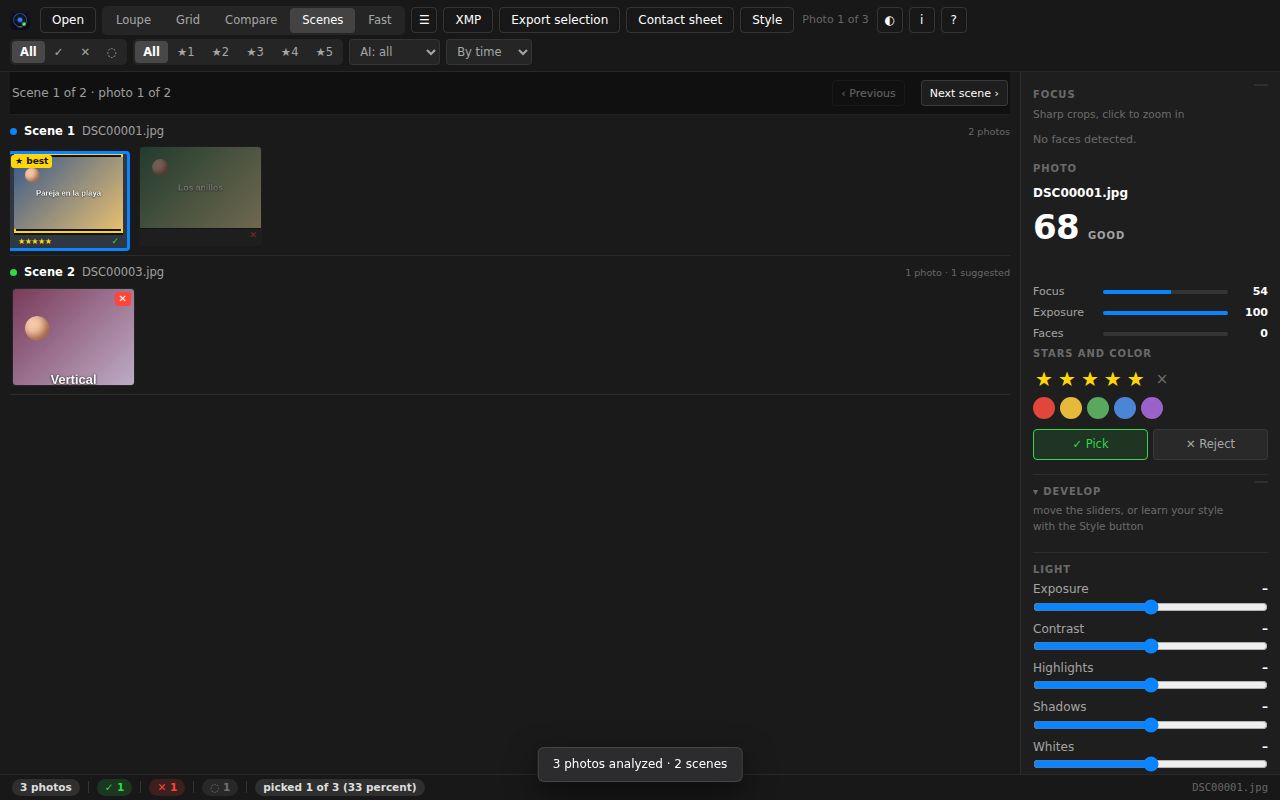
- Scenes (E): one row per scene (the bursts and moments the AI grouped), with the best first (★) and the suggested rejects with ✕. The arrows move by rows; [ and ] change scene; B goes to the best of the scene; Enter opens the photo in the loupe.
- Compare (C): the selected photos (2 to 4) side by side, or the active one with the next. One click zooms all of them with the same framing.
- Fast mode (R): the big photo and the strip, nothing else, to go through the folder with the keyboard; the next two are loaded ahead. Esc leaves.
AI develop
My style (Cmd+Shift+E, the Style button) learns from your Lightroom catalog how you develop and applies that style to the session; the sliders can also be moved by hand. Mac only (the native developer); on Windows the loupe shows an approximate view and the adjustments do go to the XMP.
- Masks (M): see, move and paint masks. In the radial one, the blue ring on the axis rotates the ellipse (with Shift in 15 degree steps). + Brush paints over the photo with M; size and feather in its box; Alt while painting erases.
- Tone curve: drag the points; double click adds a point or removes the one you touch; "Back to the AI" restores it.
- Copy and paste adjustments: Cmd+Shift+C and Cmd+Shift+V.
- Undo (Cmd+Z): the last flag or the last adjustment (sliders, masks, brush, curve, straighten, favorites brought back).
Export
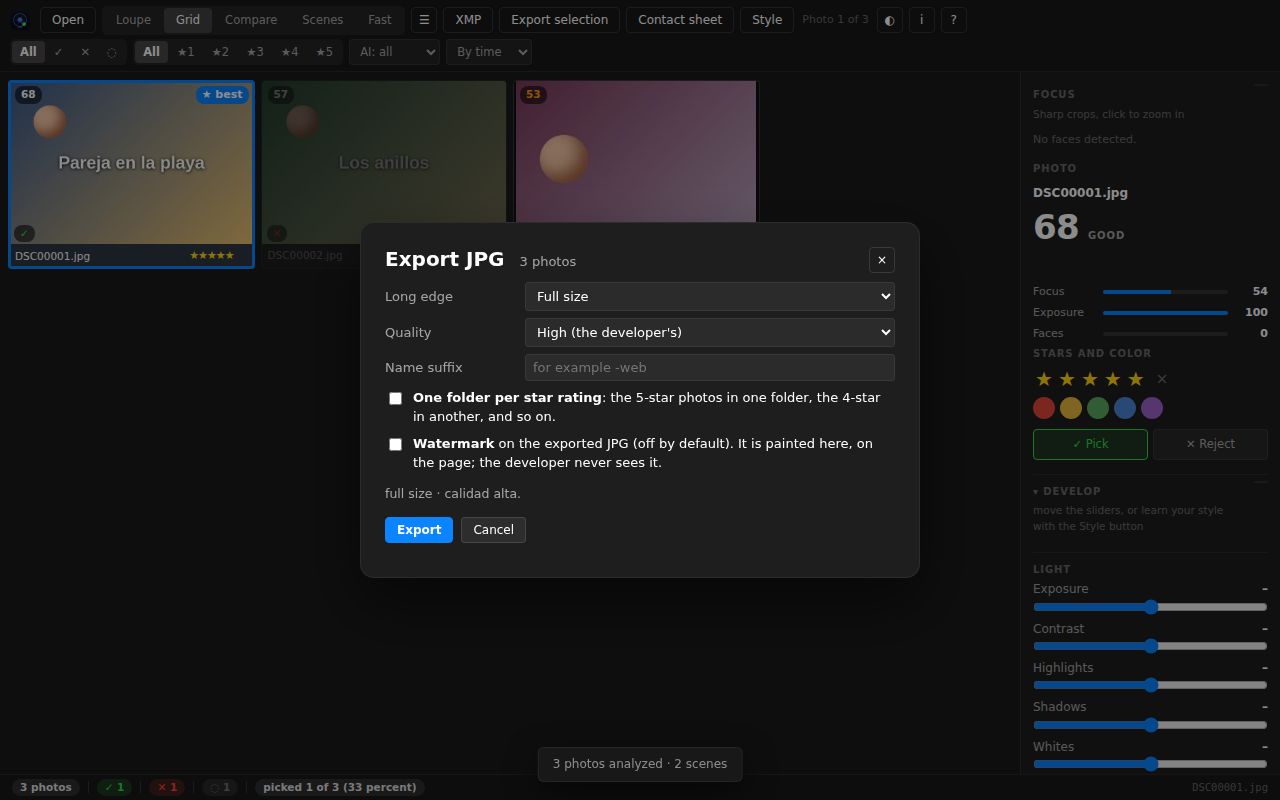
- XMP (Cmd+E, Ctrl+E on Windows): writes an
.xmpsidecar next to every RAW with stars, color, flag, develop, crop and metadata. Lightroom and Capture One read them on import or when syncing metadata (see Lightroom and the XMPs). - Export selection: copies to another folder the RAW, its XMP and the camera JPG of the picked photos (you choose what goes, and it is remembered).
- Export JPG (Mac only): develops and saves the finished photos as JPG. First you choose the long side (full, 4000, 2048 or 1080 px), quality, name suffix, one folder per star rating and the watermark (text or PNG, corner, size, opacity). Existing JPGs are never overwritten without asking.
- Contact sheet: one JPG with the thumbnails of the visible photos, 6 per row, with name and stars, to send to the client.
- Upload to the gallery (since 1.32.0): in the export JPG dialog, the exported files go to an IVAE Gallery gallery (an existing one or a new one, with name and date) with progress, retries and Cancel; the first one becomes the cover and the link appears at the end, ready to copy. If the plan is not enough, it stops and says how much is missing.
- Favorites (since 1.32.0): the toolbar button brings what the client marked in the gallery as the chosen color, matched by file name (without extension or export suffix), with a notice of the ones not found. Cmd+Z undoes it.
Keyboard shortcuts
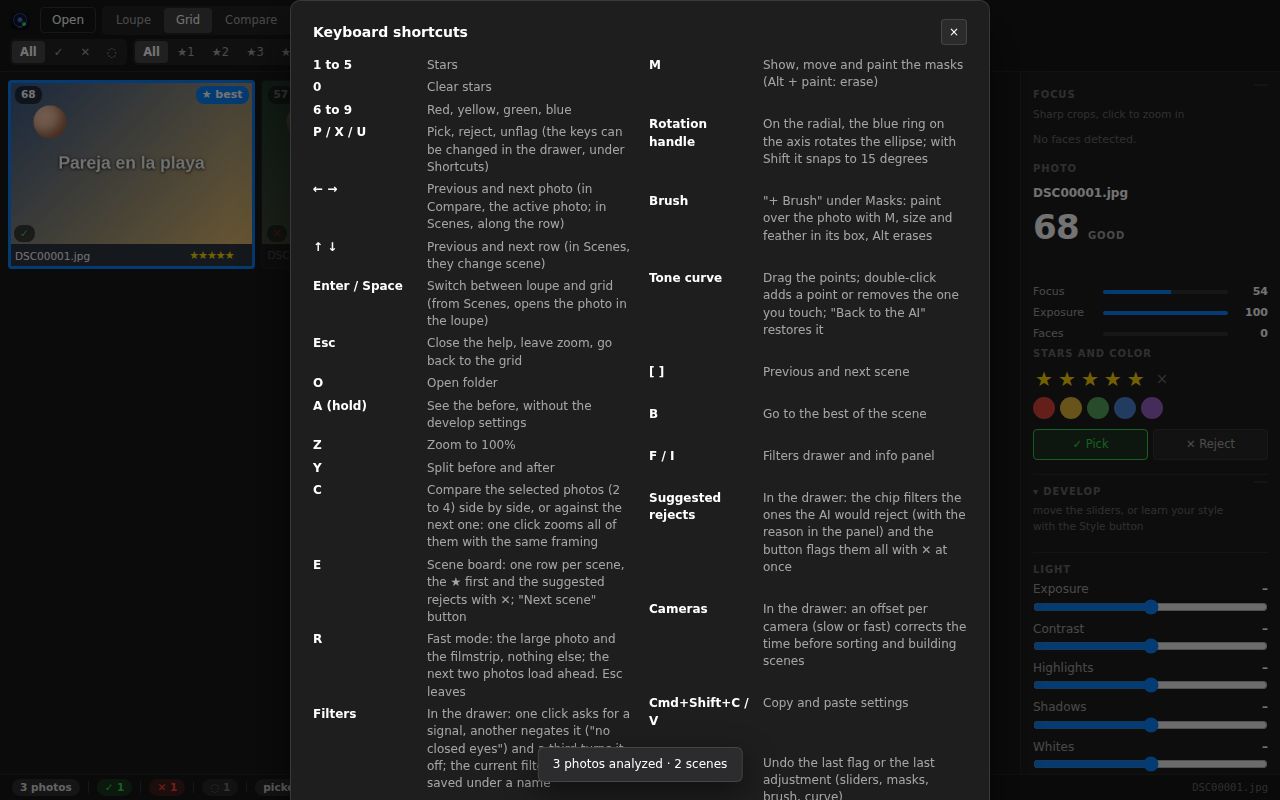
The in-app help (?) has the up-to-date list. This is the same one:
| Key | What it does |
|---|---|
| 1 to 5 | Stars |
| 0 | Clear stars |
| 6 to 9 | Red, yellow, green, blue |
| P / X / U | Pick, reject, unflag (the keys can be changed in the drawer, under Shortcuts) |
| ← → | Previous and next photo (in Compare, the active photo; in Scenes, along the row) |
| ↑ ↓ | Previous and next row (in Scenes, they change scene) |
| Enter / Space | Switch between loupe and grid (from Scenes, opens the photo in the loupe) |
| Esc | Close the help, remove the zoom, back to the grid |
| O | Open folder |
| A (hold) | See the before, without the develop |
| Z | Zoom to 100% |
| N / Shift+N | Faces up close: the next face and the previous one |
| V | Back to the whole photo from a face |
| H | Straighten: accept the horizon angle (another H removes it) |
| Y | Split before and after |
| C | Compare the selected photos (2 to 4) side by side, or with the next |
| E | Scene mosaic |
| R | Fast mode |
| M | See, move and paint masks (Alt + paint: erase) |
| [ ] | Previous and next scene |
| B | Go to the best of the scene |
| F / I | Filter drawer and data panel |
| Cmd+Shift+C / V | Copy and paste adjustments |
| Cmd+Z | Undo the last flag or the last adjustment |
| Cmd+A | Select all visible |
| Cmd+E | Export XMP (Ctrl+E on Windows) |
| Cmd+Shift+E | My style (AI develop) |
| ? | The help |
With the mouse: the rotation handle (the blue ring of the radial mask rotates the ellipse), the brush (+ Brush under Masks), the tone curve (drag and double click), and in the drawer Filters, Delivery, Keywords and rights, Selection file, Suggested rejects, Repeats and Cameras. On Windows, Cmd is Ctrl.
Installation
Download it at gallery.ivaestudios.com/productos#cull. Mac (Intel or Apple Silicon, macOS 10.15 or newer) and Windows 10 or newer, 64 bit. It updates itself: when there is an improvement it downloads it in the background and installs it when you close the app.
Troubleshooting
Mac blocks the installation
The first time you open it, macOS may say it cannot verify the developer or that the app is damaged.
- Open the Applications folder, right click (or Control + click) IVAE Cull and choose Open. In the warning, press Open again. It only happens once.
- If the warning offers no way to open, go to System Settings › Privacy & Security, scroll down to the IVAE Cull notice and press Open Anyway.
- If it says the app is damaged, the download was incomplete: delete it, download it again from the products page and repeat step 1.
SmartScreen on Windows
The first time, Windows will say "Windows protected your PC". Nothing is wrong: the installer does not carry Microsoft's paid signature. Click More info and then Run anyway. It only happens once. To check that the file is ours, the download page shows its SHA-256 fingerprint; in PowerShell, Get-FileHash on the installer must give that same code.
Windows has no native developer: the loupe shows an approximate view of the develop, developed JPGs are not exported and the Lightroom catalog is not learned from. The XMPs do carry the adjustments and Lightroom applies them all the same.
License and two computers
Cull signs in with the email and password of your IVAE Gallery studio and comes with every plan: on 1 computer on the Free and Starter plans and on 2 on Solo, Pro and Studio. The password is never stored on the computer.
- If signing in says there are already two computers, choose which one to sign out; they can also be signed out from the gallery panel, under My plan.
- If it says "This computer no longer has a session", someone signed it out from another computer or from the panel: sign in again.
- If it says "Your plan is no longer active", reactivate it under My plan; the app comes back on its own with the next heartbeat.
- Without internet the app keeps working for 7 days since the last time it connected; after that it asks you to connect for a moment.
- The free trial and the promotion are one per computer, not per account.
Lightroom and the XMPs
- Cull writes an
.xmpnext to every RAW (the "sidecar"). When you import the folder in Lightroom, the stars, color, flag and develop come in on their own. If the folder was already in the catalog, select the photos and use Metadata › Read Metadata from File. - If Lightroom already had an XMP for the photo, Cull respects it: it only changes what you flagged or developed and keeps the rest (the previous develop, the crop if you did not straighten, the keywords).
- Straightening goes as
CropAngleand the crop the way Lightroom reads them; if a photo opens tilted the wrong way, check that the app is version 1.31.0 or newer. - Capture One reads the stars and the color from the XMP; Cull's develop is for Lightroom.
- The JPGs exported by Cull carry the develop already applied; they do not need the XMP.
Other
- No faces found, or it takes long: the analysis uses the preview inside the RAW. Very dark photos or very small faces may stay unmeasured ("◉" with no number, in gray, is not an error).
- Photos come out in another order: check the camera clocks in the drawer (Cameras) and the chosen order (by time, by name, best first).
- The app is locked on opening: read the message. It is the account (see above) or a half-finished update: quit it completely and open it again.